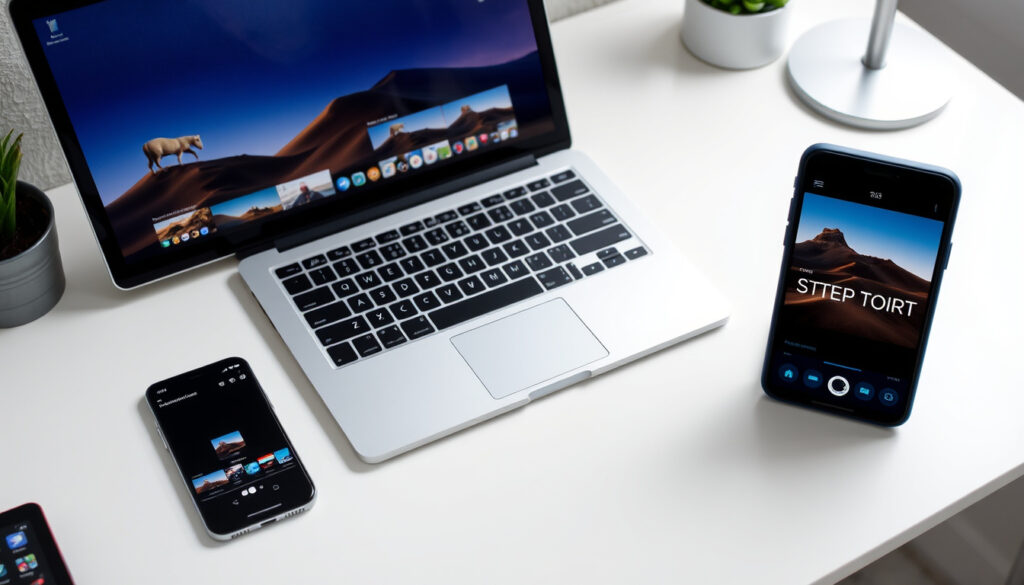
How to Take a Screenshot on iPhone, Android, Windows, Mac
Your phone shows a funny meme, your PC displays an error, or a recipe needs saving fast. Every platform has a dedicated screenshot method—once you know yours, the process takes about half a second.
iPhone method: Side button + Volume Up · Android method: Power + Volume Down · Windows shortcut: Windows + Shift + S · Mac shortcut: Command + Shift + 4 · Screenshots save to: Photos app or gallery
Quick snapshot
- iPhone X+: Side + Volume Up (Best Buy consumer electronics retailer)
- Mac full screen: Cmd + Shift + 3 (University of Southampton eLearning educational resource)
- Windows snip tool: Win + Shift + S (University of Southampton eLearning educational resource)
- Android manufacturer variations may affect exact button timing
- Three-finger swipe availability varies by device and Android version
- 2017: iPhone X shifted from Home+Power to Side+Volume Up method
- 2015: Windows 10 introduced Snip & Sketch as modern snipping option
- Find screenshots in Photos (iOS) or Gallery (Android)
- Mac saves PNGs to Desktop with auto-generated filenames
How do I do a screenshot on my iPhone?
iPhone screenshot methods changed in 2017 when Apple introduced Face ID with the iPhone X. If you’re holding an older model with a Home button, the combo is different from newer devices without one.
Press side button and volume up button
For iPhone X and later models, press the Side button and the Volume Up button simultaneously. The screen flashes white, and a thumbnail preview appears in the bottom-left corner. According to Best Buy consumer electronics retailer, this button combination works across all Face ID-equipped iPhones.
iPhone 8 and earlier use a different combo: Home + Power button. Mixing these up is the most common iPhone screenshot mistake.
Use AssistiveTouch for buttonless capture
If your buttons are worn or you prefer a software solution, enable AssistiveTouch in Settings > Accessibility > Touch. A floating button appears on screen—tap it, then choose “Screenshot” from the menu. This method works across all iOS versions.
Find screenshots in Photos app
All iPhone screenshots save to the Photos app under “Screenshots” in the Albums section. You can also locate them in the Camera Roll. As noted by Bitdefender cybersecurity firm, iOS automatically organizes captures this way.
The implication: once you know which buttons your iPhone uses, taking a screenshot takes about half a second. The thumbnail preview lets you annotate or share immediately before it vanishes.
How do I take a screenshot in my computer?
Desktop and laptop users have multiple paths depending on whether you’re running Windows or macOS. The keyboard shortcuts differ significantly, and each platform offers a built-in tool for selecting specific areas.
Windows PC shortcuts
Windows offers several screenshot methods. The PrtScn key alone captures your entire screen and copies it to the clipboard, per University of Southampton eLearning educational resource. Press Alt + PrtScn to capture only the active window. You can then paste the image into Paint, Word, or any other application using Ctrl + V.
For a more flexible approach, press Windows + Shift + S. This opens Snip & Sketch, which lets you drag-select any portion of your screen. The captured area goes to your clipboard, ready to paste. Windows 10 and 11 both include this tool, according to the same source.
Mac keyboard combos
On Mac, Command + Shift + 3 captures the entire screen and saves it directly to your Desktop as a PNG file. The Best Buy consumer electronics retailer guide confirms this works on all macOS versions. Mac screenshots save as PNG files by default with auto-generated names like “Screen Shot 2024-01-15 at 2.30 PM,” per Bitdefender cybersecurity firm.
Command + Shift + 4 lets you drag-select a specific region. After releasing the mouse, the screenshot saves to Desktop. Press Spacebar after initiating this shortcut to capture a specific window instead.
Command + Shift + 5 opens the Screenshot toolbar with options for full screen, window, or selected portion. This toolbar also lets you choose whether to save to Desktop or clipboard.
Mac’s clipboard shortcuts (Control + Shift + Command + 3 or 4) copy screenshots to clipboard instead of saving them, per Apple Support Community official forum. This keeps your Desktop clean but means you must paste immediately or lose the capture.
Snipping Tool on Windows
For Windows 7 users or those who prefer a dedicated app, the Snipping Tool remains available via the Start menu. This tool lets you capture a rectangular area, freeform shape, or entire window before saving. Windows 10 and 11 replaced this with Snip & Sketch, but the older tool still works on Windows 7 systems.
How to easily take a screenshot on phone?
Android phones share a common base method for screenshots, but manufacturer customizations can add alternatives. Here’s what works across most Android devices.
Android power + volume down
The universal Android method is pressing and holding the Power button and Volume Down button simultaneously for 1-2 seconds. As documented by Best Buy consumer electronics retailer, the screen typically flashes to confirm the capture. This works on Samsung, Google Pixel, OnePlus, and most other Android devices.
Android screenshot methods vary by manufacturer and device model. What works on your Pixel might differ slightly from your friend’s Samsung, so check your device’s Settings if the standard method doesn’t work.
Samsung palm swipe option
Samsung Android devices include a palm swipe feature as an alternative screenshot method. Enable this in Settings > Motions and Gestures > Palm swipe to capture. Per Office Watch productivity software publication, swipe the edge of your palm across the screen to capture. This requires initial setup but becomes intuitive once enabled.
Where screenshots are saved
Android screenshots typically save to the Gallery app under a “Screenshots” folder. Some devices use “Pictures > Screenshots.” Access this folder immediately after capturing to find your image.
The pattern: button combos work universally on Android, but gesture alternatives depend on your manufacturer. Samsung users have palm swipe, while Pixel and stock Android rely on button combinations.
What is the Ctrl key for screenshots?
Windows screenshot shortcuts often involve Ctrl in combination with other keys. Understanding these combos helps you choose the right method for each situation.
Windows snipping shortcuts
Ctrl + Shift + S opens the Snipping Tool or Snip & Sketch, depending on your Windows version. This is the keyboard shortcut for the snipping functionality that lets you select a specific area rather than capturing everything. Per MicroPro tech blog, Windows + Print Screen captures the entire screen and saves it directly to the Pictures folder without requiring a paste step.
Full screen capture
The PrtScn key alone copies everything on screen to clipboard. Alt + PrtScn captures only the active window. Press Windows + Print Screen for automatic saving to the Pictures > Screenshots folder. These methods cover every full-screen capture scenario.
Edit after capture
After capturing to clipboard via PrtScn, paste into any image editor. Windows Paint, included with every Windows installation, offers basic annotation tools. Press Windows + Shift + S opens Snip & Sketch, which lets you draw or highlight before saving.
The implication: Windows gives you options ranging from clipboard-based captures to automatic file saves. If Ctrl + Shift + S isn’t working, try the dedicated PrtScn key or the Windows + Print Screen combo instead.
Why is Ctrl+Shift+S not working?
Keyboard shortcuts sometimes fail due to software conflicts, outdated drivers, or focus issues. Here are practical fixes when the expected behavior doesn’t occur.
Common fixes for Windows
First, ensure the window you want to capture is active—shortcuts capture whatever is currently in focus. If pressing the combination does nothing, try clicking the desktop or switching windows. Per Follett educational technology support, restarting Windows Explorer often resolves stuck shortcut conflicts.
Some keyboards don’t register simultaneous key presses correctly, especially if multiple programs are running shortcuts. Try pressing each key slightly apart rather than exactly together.
Update or restart Snipping Tool
If the Snipping Tool itself isn’t responding, open Task Manager (Ctrl + Shift + Escape), find “Snipping Tool” or “Snip & Sketch” in the Processes list, and end the task. Then relaunch from the Start menu. Outdated apps sometimes lose shortcut registration until restarted.
Alternative methods
When keyboard shortcuts fail, use the on-screen alternatives. Search “Snipping Tool” in the Start menu, or swipe down from the top of your Android phone to find the Screenshot button in Quick Settings. Windows Game Bar (Windows + G) also includes a screenshot capture feature that sometimes bypasses shortcut conflicts.
What this means: shortcut failures usually stem from focus issues or app conflicts, not hardware problems. The backup methods built into every platform ensure you can always capture your screen without relying on a single combination.
Confirmed
- Apple Support: Side + Volume Up for iPhone X+
- Apple Support: Home + Power for iPhone 8 and earlier
- Microsoft: Windows + Shift + S opens Snip & Sketch
- Mac: Command + Shift + 3 saves full screen to Desktop as PNG
- Android: Power + Volume Down captures screen with visual flash
Unclear
- Exact button timing varies by Android manufacturer
- Three-finger swipe availability unclear across Android versions
- Quick Settings Screenshot button presence varies by device
On Mac with Touch Bar, Command + Shift + 6 captures what is displayed on the Touch Bar, providing a dedicated shortcut for this Apple-specific feature.
— Best Buy consumer electronics retailer
Adding Control to the Mac screenshot shortcut copies the image to clipboard instead of saving to Desktop, giving users flexibility between permanent saves and temporary captures.
— Apple Support Community official forum
Screenshot methods span a surprisingly wide range of options once you account for platform differences. iPhone, Android, Windows, and Mac each have their own combos, but the underlying principle stays the same: find your device’s capture trigger and press two buttons at once. For users who struggle with physical buttons, every platform offers software alternatives—AssistiveTouch on iPhone, palm swipe on Samsung, Snip & Sketch on Windows, and the Screenshot app on Mac. These alternatives exist precisely because button combos aren’t always convenient, especially for users with accessibility needs.
Related reading: How to Print Screen on Mac – Complete Shortcut Guide · Google Reverse Image Search – How to Use on Desktop and Mobile
Standard shortcuts for iPhone, Android, Windows, and Mac screenshots, including fixes for issues, align closely with those in cross-platform screenshot tutorial.
Frequently asked questions
How to take a screenshot on a laptop?
Laptops use the same shortcuts as desktops. For Windows laptops, try Fn + PrtScn (the Print Screen key is often shared with another function). For Mac laptops, Command + Shift + 3 captures the full screen.
How to take a screenshot on Mac?
Press Command + Shift + 3 for full screen (saves to Desktop as PNG). Press Command + Shift + 4 to drag-select a specific area. Press Command + Shift + 5 for the Screenshot toolbar with all options displayed.
Where do screenshots go on Android?
Android screenshots save to the Gallery app under “Screenshots” or “Pictures > Screenshots,” depending on your device. Some Android versions use Google Photos as the default gallery app.
How to take a screenshot without buttons?
On iPhone, enable AssistiveTouch in Settings > Accessibility > Touch and tap “Screenshot” from the floating menu. On Samsung Android, enable palm swipe in Settings > Motions and Gestures. On Windows, use Snip & Sketch from the Start menu.
What to do if screenshot not saving?
Check your storage space—full storage prevents saves. On iPhone, verify Photos > Screenshots album exists. On Android, check Gallery permissions in Settings > Apps. On Mac, confirm the Desktop folder is accessible and not read-only.
More related posts
 Alex Dunne Penalty Formula 2 Au tria: Di qualification Impact
 Joe Hendry: WWE Status, Real Name, Career, and Viral Song
 Range Rover for Sale – Used Deals Under $15K Near You
 Barry Keoghan: Biography, Height, Joker Role, and Facts
 Interstellar Object 3I/ATLAS: Facts, Viewing & Alien Claims
 Calories in an Egg – Exact Counts by Size and Method
 How Much Water Should You Drink a Day – By Age, Sex and Activity